
Filter
Click the Filter toolbar icon to open the Filter panel - a list of named, reusable filters you create yourself. With none enabled, every note shows; enabling one or more hides every note that doesn't match.
Creating a filter
Click "+ new filter" to add one, then click its pencil icon to edit it. Give it a name, then click "+ add" to add criteria to it. A note matches a filter only if it satisfies every criterion in that filter - criteria within one filter always AND together.
The criteria
Three kinds of criteria: plain ones that look at a note directly (its text, tags, properties, links), link-graph analytics computed from how your notes connect (bridging, prominence, activity, structure, connectivity, community), and one content analytic that ignores links entirely (semantic clustering). Every Color & size group uses exactly the same criteria, applied to coloring/sizing instead of hiding.
Plain criteria
- Text - the note's title or body contains a word or phrase (case-insensitive substring match).
- Tag - the note has any of the tags you pick (one criterion covers several tags at once - no need for a separate row per tag).
- Property - a frontmatter value, compared with
contains/equals/does not equal/is empty/is not empty. - Folder - the note's path is inside this folder, including subfolders.
- Filename - the note's title (not its body) contains a word or phrase.
- Not edited at least (days) - the note hasn't been modified in at least this many days.
- Minimum number of links - the note has at least this many links (its degree in the graph, in + out combined).
- Node type - matches one specific kind of node: a normal note, a tag node, an attachment node, or a nonexistent link (a link to a note that doesn't exist yet, also called a "ghost node"). Tag and attachment nodes only appear on the graph at all once you turn them on under Appearance - each is off by default, since either one adds real nodes/edges to the graph, not just a style change.
Link-graph criteria
These run the same graph algorithms the Diagnostics panel uses, so you can turn any of them into a reusable filter (or a Color & size group) instead of only reading them off a list.
- Bridging (betweenness centrality) - whether a note lies on the shortest path between many other pairs of notes, i.e. how much of a structural bridge it is. A note can have very few links and still score high here, if it's the only connection between two otherwise-separate parts of the vault - that's what sets it apart from "Minimum number of links." Choose "connects otherwise-separate notes" (top half of what's present) or "not a bridge note" (bottom half).
- Prominence (PageRank) - how prominent a note is, weighted by how prominent the notes linking to it are. Ten links from ten obscure notes count for less than one link from an already-prominent hub - unlike "Minimum number of links," which treats every link the same. Choose "a prominent note" (top half) or "not a prominent note" (bottom half).
- Activity - whether a note sits in an active or inactive neighborhood of the vault. Notes are grouped into communities (see "Community" below), then compared by how recently each community was edited overall. Choose "active area of the vault" or "inactive area of the vault." This is about the neighborhood, not the individual note - see "Not edited at least" above for a note's own edit date, independent of who it's linked to.
- Structure - whether a note's community (see below) is mostly gathered in one folder, or scattered across several. Flags a group of notes that clearly belongs together by links but has drifted across mismatched folders over time - the kind of thing that's easy to miss by browsing folders one at a time. Choose "linked notes scattered across folders" or "linked notes gathered in one folder."
- Connectivity - whether a note's connected component is the vault's single largest one (its "main body"), or one of the smaller pockets cut off from it. Choose "cut off from the vault's main body" or "in the vault's main body."
- Community - matches every note in one specific detected community. See its own section below - it's the criterion most people have questions about the first time they meet it.
Content criterion
- Semantic cluster - matches every note in one specific semantic cluster, grouped by what notes are actually about rather than by any link between them. See its own section below.
Understanding Community (the hardest one to explain)
A community is a group of notes that link to each other a lot more than they link to the rest of your vault - detected automatically by an algorithm (Louvain community detection) run over your actual link graph, every time it matters. It has nothing to do with folders, tags, or anything you set up yourself; it's purely "which notes cluster together if you only look at who links whom." A vault about, say, cooking and woodworking will usually end up with one community per topic even if you never tagged anything that way - the notes about roasting techniques all link to each other far more than they link to the notes about joinery, so the algorithm separates them on its own.
A few things that consistently confuse people the first time:
- You don't create or name communities. They're recomputed from your current link graph whenever a Community/Activity/Structure criterion needs them (and cached in between), so they can genuinely change as you add or remove links - a community isn't a permanent label attached to a note, it's a snapshot of "who currently clusters with whom."
- The numbering is just "biggest first," and can shift. Internally each community gets a rank -
0is the largest community present,1the next largest, and so on - recomputed fresh from your current link graph every time, not a permanent ID. That number is never shown to you directly: when you add a Community criterion, you get a note-picker instead - type any note you recognize, and Clew resolves which community it's currently in for you, showing "→ Community 2 · 17 notes" so the number always comes with real context. A criterion saved this way matches "whichever community currently holds rank 2," so if your link graph changes enough to reorder the rankings (a different community growing past it, say), the criterion can end up matching a different community than the one you originally picked from - a rare edge case in practice (rankings are usually stable), but worth knowing about if a group's matches ever look unexpectedly different after a big round of edits. - A community isn't the same thing as "connected." Two notes can be in the same connected component (see "Connectivity" above) without being in the same community - Louvain groups by density of linking, not just by "is there any path at all." A vault's whole main body is usually one connected component but several communities.
- Community's color used to auto-sync to a fixed palette - it doesn't any more. An earlier version of Clew tried to color every "Community" group automatically from a fixed palette the moment you picked a community, on the theory that "Community 1 is always red" would be a useful convention. User feedback made clear that was more surprising than helpful - picking a note in the note-picker could silently repaint a group you'd already colored yourself. Community's color is now a plain, manual choice in Color & size, exactly like every other criterion type - picking a community only changes which notes match, never what color they get.
When to reach for it: whenever "these notes clearly belong together, even though I never explicitly grouped them" is the thing you want to see - a fast way to discover topic clusters you didn't consciously build, before deciding whether to formalize them as tags or folders.
Understanding Semantic clustering
Semantic clustering groups notes by what they're actually about, using a local text-embedding model - not by any link between them at all. This is the one criterion in Clew that ignores your link graph entirely: two notes that both happen to discuss the same topic, written independently, in different folders, with zero tags in common and no link ever drawn between them, still land in the same semantic cluster if their content reads as related.
- How it works, briefly: the first time you add a Semantic cluster criterion, Clew reads every note's title and body, turns each one into a numeric "meaning vector" using a small embedding model that runs entirely on your own device (nothing is ever sent anywhere), and groups notes whose vectors are close together. The panel shows "Computing embeddings…" while this runs - a one-time cost per note (a few seconds for a small vault, longer for a large one, and longer still the very first time, since the ~20MB model itself has to download once). After that, results are cached and only recomputed for notes you've actually changed.
- Community vs. Semantic cluster - when to use which: reach for Community when you want "notes that reference each other a lot" (a structural, link-based question); reach for Semantic cluster when you want "notes that are about the same thing" regardless of whether you ever got around to linking them. The two can and do disagree - a note you wrote about a topic six months before you started cross-linking your notes on it will show up in the right semantic cluster immediately, long before it necessarily ends up densely linked into the matching community.
- Same note-picker, same "→ cluster · N notes" confirmation as Community above - pick any note you recognize, Clew resolves which cluster it's in.
- Same removed-auto-color behavior as Community: picking a cluster only changes which notes match, never the group's color.
Include or exclude
Most criteria show one small, clickable word right in their own controls - e.g. "Folder is" / "Folder is not", "Filename contains" / "does not contain", "At least" / "less than" this many days. Click the word to flip a criterion from including matches to excluding them, and back. The link-graph criteria with a two-way choice (Bridging, Prominence, Activity, Structure, Connectivity) work the same way - the phrase itself is the toggle, since each one already reads as a complete either/or statement (there's no separate "high"/"low" number to set a cutoff on).
What does this criterion mean?
Every criterion, once added to a filter, has an (i) button next to its name - click it to reveal a one-line explanation of exactly what it matches, right there in the row. Useful for the link-graph and content criteria especially (Bridging, Prominence, Activity, Structure, Community, Semantic cluster), but every criterion type has one, including the "obvious" ones like Tag or Folder.
Several filters at once
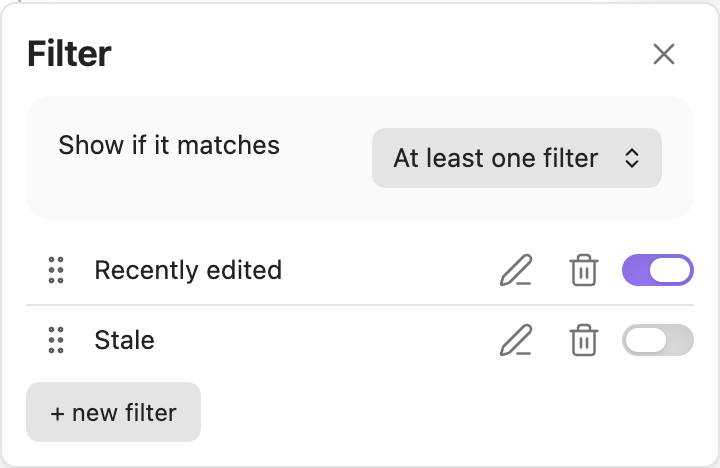
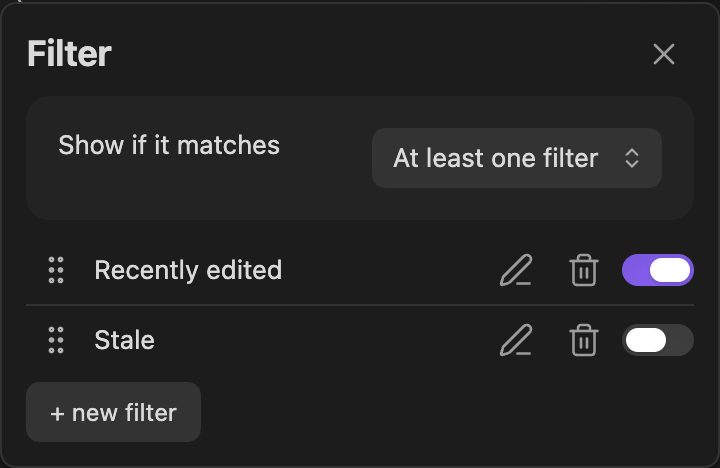
Create a second filter, and a "Show if it matches: At least one filter" dropdown appears above the list (hidden with 0 or 1 filter - nothing to combine yet). A note shows if it matches at least one enabled filter by default; switch it to "Every filter" to require a note to satisfy all of the enabled filters instead (effectively AND-ing separate filters together).
Drag a filter's handle to reorder the list - purely for your own organization, since it has no effect on which notes are shown.
When nothing matches
If an enabled filter (or combination) matches no notes, the graph shows a card explaining that, with a "Reset filter" button to disable every filter in one click.